
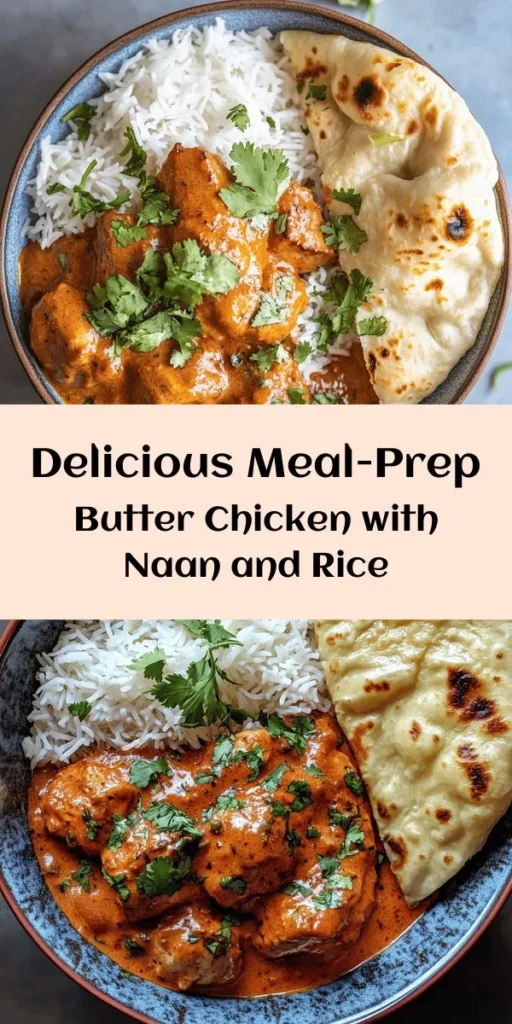
Introduction to Meal-Prep Butter Chicken with Rice and Garlic Naan
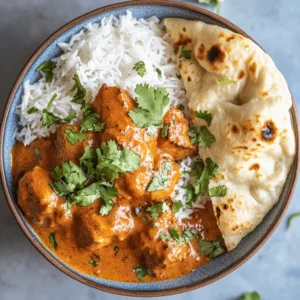
Welcome to the world of Butter Chicken, a culinary gem that brings the vibrant and aromatic flavors of Indian cuisine right into your kitchen. This dish, known for its creamy sauce and tender chicken, has gained immense popularity across the globe, becoming a staple in Indian restaurants and home kitchens alike. In this comprehensive guide, we will not only explore the delightful recipe for Butter Chicken but also provide a perfect meal prep option that pairs beautifully with fluffy basmati rice and homemade garlic naan.
Meal prepping has become increasingly popular among food enthusiasts and busy individuals alike, as it allows for delicious home-cooked meals to be enjoyed throughout the week without the stress of daily cooking. This Butter Chicken recipe is ideal for meal prep, as it can be made in large batches and stored for easy reheating. The rich flavors intensify over time, making it a dish that is just as enjoyable on the third day as it is on the first.
As we embark on this culinary journey, we will delve into the intricacies of the preparation process, explore the key ingredients that make Butter Chicken a standout dish, and discuss the numerous benefits of meal prepping. By the end of this article, you will be well-equipped to create your own flavorful Butter Chicken with Rice and Garlic Naan, perfect for any occasion.
Understanding Butter Chicken: A Culinary Classic
The History of Butter Chicken
Butter Chicken, or “Murgh Makhani,” has its roots deeply embedded in Indian cuisine, with its origins tracing back to the 1950s in Delhi. The dish was created by the chefs at the Moti Mahal restaurant, who ingeniously repurposed leftover chicken from the tandoor (a traditional clay oven) by simmering it in a rich tomato-based sauce enriched with butter and cream. This innovative approach not only reduced food waste but also resulted in a dish that was creamy, flavorful, and irresistibly delicious.
Over the years, Butter Chicken has evolved, with various regions adding their unique touches to the recipe. Today, it is celebrated not only in India but around the world, with each culture putting its own spin on this beloved dish. From spicy versions to lighter interpretations, Butter Chicken continues to captivate taste buds everywhere.
Key Ingredients that Define Butter Chicken
The magic of Butter Chicken lies in its ingredients, particularly the spices and marinades that define its flavor profile. The following key ingredients play an essential role in creating the dish’s signature taste:
– Spices: The foundation of Indian cuisine, spices such as garam masala, cumin, and coriander are integral to Butter Chicken. Their aromatic qualities infuse the dish with depth and complexity, making each bite a flavorful experience.
– Yogurt: A crucial element in the marination process, yogurt helps tenderize the chicken while adding tanginess. It acts as a base for the marinade, allowing the spices to adhere to the chicken and penetrate deeply, ensuring maximum flavor.
– Cream: Once the chicken is cooked, cream is added to the sauce to create the rich, velvety texture that Butter Chicken is famous for. It balances the acidity of the tomatoes and enriches the overall flavor of the dish.
In addition to these primary ingredients, the use of fresh garlic, ginger, and tomatoes adds layers of flavor that elevate Butter Chicken to a culinary masterpiece.
Marinating the Chicken: The Key to Flavorful Butter Chicken
Why Marination is Essential
Marination is a crucial step in the preparation of Butter Chicken, as it allows the flavors to penetrate the chicken, resulting in tender, flavorful meat. The process of marination involves soaking the chicken in a mixture of spices, yogurt, and sometimes lemon juice for a specific period. This not only enhances the flavor but also helps to tenderize the meat, making it juicier when cooked.
The science behind marination lies in the interaction between the acidic components (like yogurt and lemon juice) and the proteins in the meat. These acids break down the protein structures, allowing flavors to infuse more thoroughly. This is why taking the time to marinate your chicken is essential for achieving the best results.
Step-by-Step Guide to Marinating
To ensure your Butter Chicken is packed with flavor, follow these simple steps for marinating:
1. Preparing the Marinade: In a large mixing bowl, combine yogurt, minced garlic, ginger paste, lemon juice, and a blend of spices, including garam masala, cumin, coriander, and chili powder. Whisk until smooth.
2. Adding the Chicken: Cut boneless chicken thighs or breasts into bite-sized pieces. Add the chicken to the marinade, ensuring each piece is well-coated.
3. Timing for Optimal Flavor Absorption: Cover the bowl with plastic wrap and refrigerate for at least 1 hour, but ideally for 4 to 6 hours, or overnight for maximum flavor. This extended marination time allows the spices to permeate the chicken fully.
By following these steps, you will set the foundation for a flavorful Butter Chicken that will impress anyone who is lucky enough to indulge in your culinary creation.
Cooking the Butter Chicken: Techniques for Perfect Results
Once the chicken has been marinated, it’s time to bring the dish to life with the right cooking techniques. The cooking process involves several steps that build layers of flavor and ensure the chicken is cooked to perfection.
Choosing the Right Cookware
Using the right cookware is essential for achieving optimal results when cooking Butter Chicken. A heavy-bottomed skillet or a Dutch oven is recommended, as these types of cookware provide even heat distribution and allow for better browning of the chicken. Avoid using non-stick pans, as they may not achieve the desired caramelization which adds depth to the dish.
Step-by-Step Cooking Instructions
1. Sautéing Onions for Flavor Depth
Start by heating a few tablespoons of oil or ghee (clarified butter) in your chosen skillet over medium heat. Once hot, add finely chopped onions and sauté until they become golden brown. This process can take about 8-10 minutes, and it is crucial as caramelized onions develop a rich sweetness that forms the base of the sauce.
2. The Importance of Browning the Chicken
Next, add the marinated chicken to the skillet in batches to avoid overcrowding. Sear the chicken for about 5-7 minutes until it is browned on the outside. This step is vital, as browning the chicken enhances the flavor through the Maillard reaction, creating a depth of taste that simply cannot be achieved by boiling or steaming.
3. Building the Sauce
Once the chicken is browned, it’s time to build the sauce. Add crushed tomatoes to the skillet, stirring to incorporate with the browned chicken and onions. Allow the mixture to simmer for about 10 minutes, letting the flavors meld together. Once the tomatoes have cooked down and the sauce has thickened slightly, reduce the heat and stir in heavy cream.
The addition of cream transforms the sauce into a luscious, velvety consistency that is the hallmark of Butter Chicken. Stir until fully combined and adjust the seasoning with salt and pepper to taste.
With these steps completed, you will have created a rich and flavorful Butter Chicken that embodies the essence of Indian cuisine.
Preparing the Rice: Achieving Fluffy Basmati
As your Butter Chicken simmers away, it’s time to turn your attention to the rice. Fluffy basmati rice is the perfect accompaniment to soak up the delicious sauce, making it an essential component of the dish. Here’s how to achieve perfectly cooked basmati rice:
1. Rinsing the Rice: Begin by measuring out your basmati rice and rinsing it under cold water until the water runs clear. This step is crucial, as it removes excess starch that can make the rice sticky.
2. Soaking: After rinsing, soak the rice in water for about 30 minutes. Soaking allows the grains to absorb some moisture, resulting in a fluffier texture when cooked.
3. Cooking: In a pot, combine the soaked rice with fresh water in a ratio of 1:1.5 (one cup of rice to one and a half cups of water). Add a pinch of salt and a teaspoon of oil or butter for flavor. Bring the mixture to a boil, then reduce the heat to low, cover the pot, and let it simmer for about 15-20 minutes until the water is absorbed and the rice is tender.
Following these steps will ensure that your basmati rice is light, fluffy, and the perfect complement to your flavorful Butter Chicken.
In this first part of our guide, we have explored the rich history of Butter Chicken, the significance of marinating the chicken, and the initial steps to cook this beloved dish. Stay tuned for the next part, where we will delve into the preparation of homemade garlic naan and additional tips for meal prepping this delicious Butter Chicken with Rice.
The Significance of Rinsing Rice
When it comes to cooking basmati rice, rinsing is a crucial step that can significantly impact the final texture and flavor of the dish. Rinsing the rice helps to remove excess surface starch that can cause the grains to become gummy during cooking. Instead, you want each grain to remain separate, fluffy, and light. Rinsing also helps to wash away any impurities or dust that may have accumulated during processing and packaging.
How Rinsing Affects Texture and Flavor
By rinsing basmati rice, you enhance its overall quality. The absence of excess starch allows the grains to cook evenly and absorb flavors better, making each bite more enjoyable. Additionally, rinsing can help improve the aromatic qualities of basmati rice, allowing its natural nutty fragrance to shine through. A simple rinse under cold running water until the water runs clear can make all the difference in your final dish.
Cooking Methods for Basmati Rice
When it comes to cooking basmati rice, you have a couple of excellent options: the stovetop method or using a rice cooker. Both methods can yield delicious results, but the choice depends on your personal preference and kitchen equipment.
Stovetop vs. Rice Cooker
Stovetop Method:
1. Begin by rinsing the rice as described above.
2. In a medium saucepan, combine 1 cup of rinsed basmati rice with 1.5 cups of water and a pinch of salt.
3. Bring the mixture to a boil over medium-high heat.
4. Once boiling, reduce the heat to low, cover the saucepan, and let it simmer for about 15-20 minutes, or until the water is absorbed and the rice is tender.
5. Remove from heat and let it sit, covered, for another 5 minutes to allow the steam to finish cooking the rice.
Rice Cooker Method:
1. After rinsing the rice, place it in the rice cooker and add the appropriate amount of water (typically 1 cup of water for every cup of rice).
2. Close the lid and select the ‘white rice’ setting.
3. Once the cooker indicates that the rice is ready, let it sit for an additional 5-10 minutes before fluffing with a fork.
Tips for Achieving the Perfect Consistency
Regardless of the method you choose, here are some tips to ensure your basmati rice turns out perfectly each time:
– Soak the rice for 20-30 minutes before cooking. This helps the grains to expand and results in a fluffier texture.
– Use a pot with a tight-fitting lid to prevent steam from escaping.
– Avoid lifting the lid while the rice is cooking to maintain a consistent cooking environment.
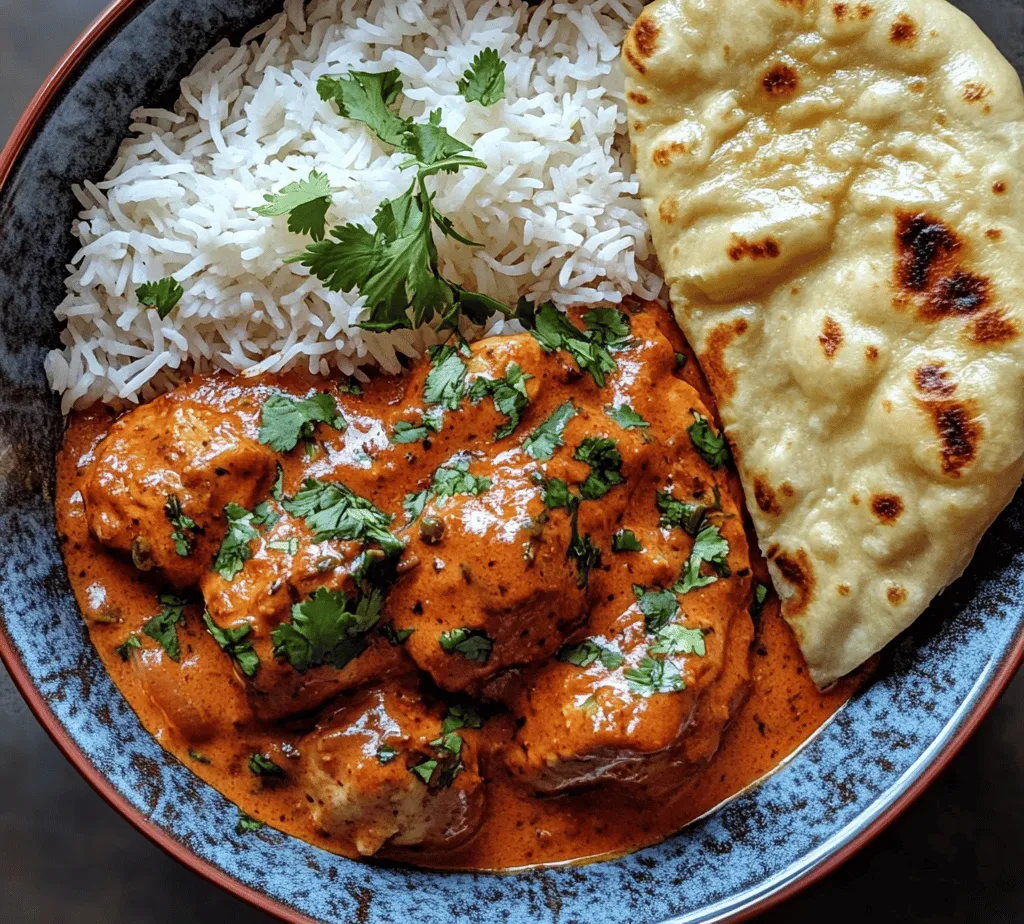
Making Garlic Naan: A Delicious Accompaniment
Garlic naan is a classic Indian flatbread that pairs beautifully with Butter Chicken. Its soft, fluffy texture and rich garlic flavor make it an irresistible side dish.
Essential Ingredients for Naan
To make delicious garlic naan, you will need the following key ingredients:
– Flour: All-purpose flour is commonly used for naan, but you can also use whole wheat flour for a healthier option.
– Yogurt: This adds moisture and helps to create a tender texture.
– Yeast: Active dry yeast will help the naan to rise, yielding a light and airy bread.
– Garlic: Fresh minced garlic enhances the flavor of the naan and provides that signature aroma.
– Butter: Melted butter brushed on top adds richness and helps to achieve a beautiful golden color.
Step-by-Step Instructions for Preparing Naan
1. Kneading the Dough and Letting It Rise:
– In a large bowl, combine 3 cups of all-purpose flour, 1 teaspoon of sugar, 1 teaspoon of salt, and 2 teaspoons of active dry yeast.
– Add 1 cup of warm water and 1/2 cup of plain yogurt. Mix until a rough dough forms.
– Knead the dough on a floured surface for about 10 minutes until smooth and elastic.
– Place the dough in a greased bowl, cover with a damp cloth, and let it rise in a warm place for about 1 to 2 hours, or until doubled in size.
2. Techniques for Cooking Naan on a Skillet:
– Once the dough has risen, punch it down and divide it into 6-8 equal portions.
– Roll out each portion into a teardrop or oval shape, about 1/4 inch thick.
– Preheat a cast-iron skillet or non-stick pan over medium-high heat.
– Place the rolled-out naan onto the skillet and cook for 1-2 minutes, until bubbles form on the surface.
– Flip the naan and cook for another 1-2 minutes, pressing gently with a spatula.
– Remove from the skillet and immediately brush with melted butter and sprinkle with minced garlic and fresh cilantro, if desired.
Meal Prep: Storing and Reheating Your Butter Chicken Meal
Meal prepping is an effective strategy for saving time and ensuring you have delicious, home-cooked meals ready to enjoy throughout the week. Preparing Butter Chicken with rice and naan in advance allows you to savor this flavorful dish even on the busiest days.
The Benefits of Meal Prepping
– Time-Saving Advantages: By preparing your meals in advance, you eliminate the stress of daily cooking, allowing you to enjoy more free time or focus on other important tasks during the week.
– Nutritional Benefits of Home-Cooked Meals: Meal prepping gives you complete control over the ingredients, ensuring healthier choices and portion sizes compared to dining out or eating processed foods.
How to Properly Store Your Meal
To keep your Butter Chicken meal fresh and flavorful, proper storage is essential:
– Recommended Containers for Meal Prep: Use airtight glass or BPA-free plastic containers for storing your meal. Glass containers are preferable as they are microwave-safe, do not retain odors, and are easy to clean.
– Best Practices for Reheating to Maintain Flavor and Texture:
– When reheating Butter Chicken, add a splash of water or cream to maintain moisture. Heat in a microwave-safe dish covered with a lid or microwave-safe wrap to trap steam.
– For rice, sprinkle a little water over it before reheating to prevent it from drying out. Heat in short intervals while stirring to ensure even warming.
Nutritional Insights: Benefits of Butter Chicken and Accompaniments
As you enjoy your flavorful meal-prepped Butter Chicken, it’s essential to consider the nutritional content of your dish and the health benefits of its ingredients.
Analyzing the Nutritional Content
– Caloric Breakdown of the Meal: A standard serving of Butter Chicken (approximately 1 cup) contains around 400-500 calories, depending on the recipe variations and portion sizes. Basmati rice typically adds an additional 200 calories per serving.
– Health Benefits of Key Ingredients: Chicken is a great source of lean protein, while yogurt used in the marinade provides probiotics, which support digestive health. The spices used in Butter Chicken, such as turmeric and ginger, also carry anti-inflammatory properties.
Balancing Flavors and Nutrition
To create a well-rounded meal, it’s essential to incorporate vegetables alongside your Butter Chicken and rice. Consider adding steamed broccoli, sautéed spinach, or a fresh salad to enhance the nutritional profile. Not only do these vegetables provide essential vitamins and minerals, but they also add color and crunch to your plate.
Conclusion: Enjoying Your Flavorful Meal-Prep Butter Chicken
Through this exploration of the flavorful Butter Chicken dish, we have delved into the intricacies of preparing this classic recipe, complete with its traditional accompaniments of basmati rice and garlic naan. This dish not only tantalizes the taste buds but also serves as an excellent option for meal prep, making it easy to enjoy a satisfying meal throughout your busy week.
By understanding each step—from marinating the chicken to perfecting the naan—you can recreate this beloved Indian dish in the comfort of your home. Embrace the benefits of meal prepping and discover how easy it is to savor a taste of India while maintaining a healthy lifestyle. With just a little planning, you can indulge in Butter Chicken, rice, and naan, elevating your weekly meals to a whole new level of flavor and enjoyment.