Introduction
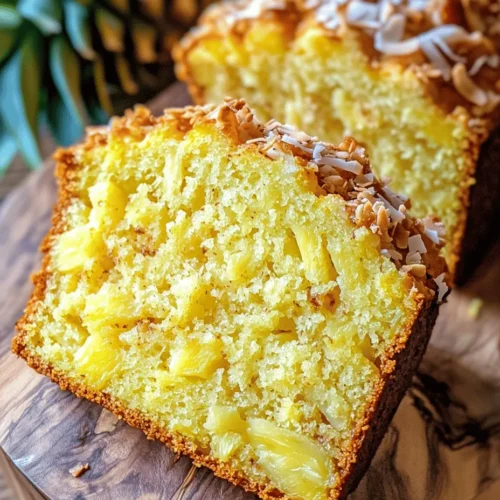
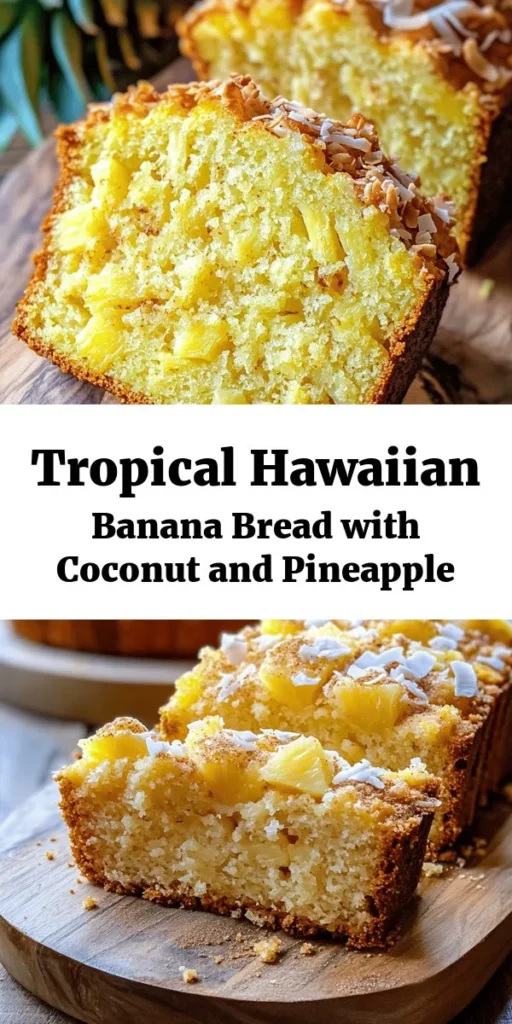
Welcome to a tropical escape for your taste buds with our delightful Hawaiian Banana Bread recipe, infused with the irresistible flavors of pineapple and coconut. This moist, sweet bread is not just a treat; it’s a celebration of tropical ingredients that can brighten up any day. Whether you’re enjoying it at breakfast, as an afternoon snack, or served as a delightful dessert, this recipe is sure to impress your family and friends.
The allure of Hawaiian cuisine is deeply rooted in its use of fresh, vibrant ingredients that reflect the lush landscapes and rich cultural traditions of the islands. Our Hawaiian Banana Bread captures this essence perfectly. Imagine biting into a loaf that combines the sweetness of ripe bananas, the tartness of juicy pineapple, and the distinct tropical flavor of coconut. Each slice transports you to a sun-soaked beach, where the aroma of fresh baked goods mingles with the salty sea breeze.
This recipe is not merely about indulging in delicious flavors; it’s about embracing the warmth and hospitality that Hawaii is known for. In every bite, you’ll experience the spirit of the islands, making it a perfect addition to any gathering or a comforting treat for yourself.
The Allure of Tropical Ingredients
Exploring the Unique Flavors of Hawaii
Hawaii is renowned for its diverse and vibrant culinary landscape, influenced by a rich mix of cultures and traditions. The islands boast an abundance of tropical fruits that serve as the backbone of many local dishes. This Hawaiian Banana Bread highlights three of the most beloved tropical ingredients: bananas, pineapples, and coconuts.
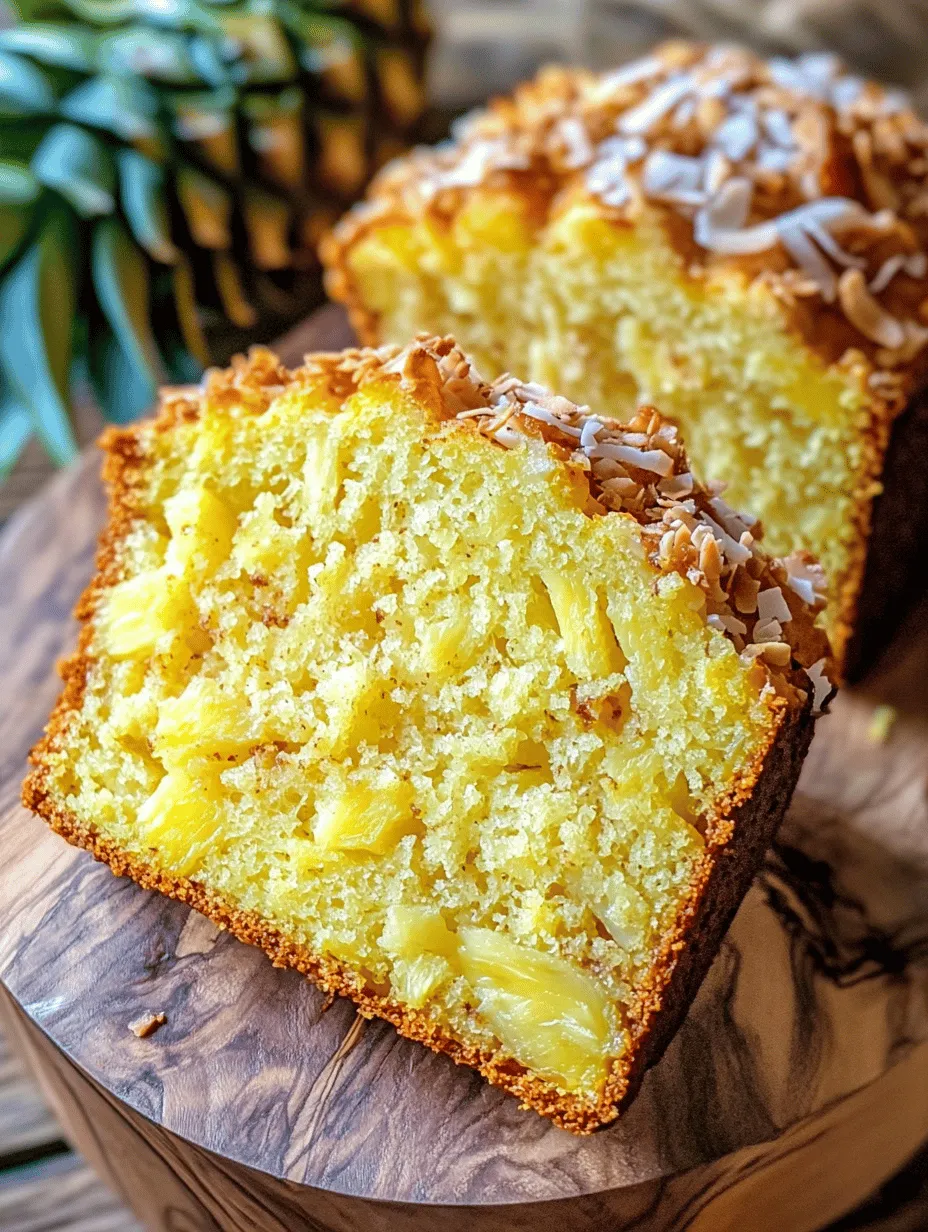
Bananas are not just a staple fruit; they are a symbol of Hawaiian agriculture. Grown in lush plantations across the islands, they provide a natural sweetness that enhances the flavor profile of baked goods. Pineapples, with their bright, tangy sweetness, add a refreshing contrast and moisture that elevates the bread to new heights. Finally, shredded coconut introduces a chewy texture and nutty flavor that ties the whole recipe together, creating a harmonious blend of tropical goodness.
The Significance of Bananas, Pineapple, and Coconut in Hawaiian Cuisine
In Hawaiian culture, bananas have long been celebrated for their nutritional value and versatility. They are often used in both savory and sweet dishes, showcasing their adaptability. Pineapples, famously known as the “king of fruits,” symbolize hospitality in Hawaiian traditions and are featured in a variety of culinary applications, from savory salads to luscious desserts.
Coconut, often referred to as the “tree of life,” is another essential ingredient in Hawaiian cooking. From coconut milk to shredded coconut, this fruit adds depth and richness to dishes, making it a beloved component in many recipes. Together, these fruits tell the story of Hawaii’s agricultural heritage and the local flavors that define the islands.
Nutritional Benefits of Tropical Fruits
Beyond their delightful flavors, the tropical fruits featured in this recipe offer numerous health benefits. Bananas are an excellent source of potassium, which is vital for maintaining heart health and regulating blood pressure. They are also rich in dietary fiber, which aids in digestion and promotes a healthy gut.
Pineapples are packed with vitamin C, antioxidants, and bromelain, an enzyme that can help with digestion and reduce inflammation. Their natural sweetness makes them a healthier alternative to refined sugars in baking. Coconut, particularly in its unsweetened shredded form, provides healthy fats that can boost energy levels and support brain health.
By incorporating these nutrient-dense ingredients into your Hawaiian Banana Bread, you’re not only treating your taste buds but also nourishing your body with the goodness of tropical fruits.
Ingredients Breakdown
Understanding the key components of Hawaiian Banana Bread is essential for achieving the best results. This recipe combines both wet and dry ingredients to create a moist and flavorful loaf that showcases the essence of the tropics.
The Role of Ripe Bananas in Moisture and Sweetness
Ripe bananas are the star of this recipe. Their natural sweetness contributes significantly to the flavor of the bread, while their high moisture content ensures a soft and tender crumb. When selecting bananas for this recipe, look for those with a few brown spots; these are the sweetest and will yield the best results.
How Crushed Pineapple Enhances Flavor and Texture
Crushed pineapple adds a burst of tropical flavor and moisture to the bread. It not only complements the sweetness of the bananas but also contributes a delightful texture that contrasts with the dense crumb of the loaf. When using crushed pineapple, be sure to drain it well to avoid excess moisture, which can lead to a soggy bread.
The Importance of Unsweetened Shredded Coconut
Unsweetened shredded coconut is another crucial ingredient that brings depth to the bread. It adds a chewiness that enhances the overall texture and imparts a rich, nutty flavor without overpowering the other ingredients. Opt for high-quality, unsweetened coconut to ensure that your Hawaiian Banana Bread achieves the perfect balance of sweetness and flavor.
The Sweet Balance of Brown and Granulated Sugar
This recipe calls for both brown and granulated sugar, which together create a complex sweetness that elevates the flavors of the bananas and pineapple. Brown sugar, with its molasses content, adds a subtle hint of caramel and moisture, while granulated sugar provides a clean sweetness that helps the bread rise. This combination ensures that each slice of banana bread is perfectly sweet and indulgent without being overly sugary.
Preparation Steps
Now that we’ve discussed the ingredients that will bring our Hawaiian Banana Bread to life, let’s move on to the preparation steps. Setting the stage for baking is crucial, as it ensures that everything goes smoothly and that your bread comes out perfectly every time.
Setting the Stage: Prepping Your Kitchen for Success
Before you dive into the baking process, it’s essential to prep your kitchen. Gather all the necessary ingredients and equipment, including mixing bowls, measuring cups, a whisk, and a loaf pan. Having everything within arm’s reach will streamline the process and help you focus on creating your delicious banana bread.
Preheating the Oven: The Importance of Temperature Control
Preheating your oven is a critical step in baking that should never be overlooked. For this Hawaiian Banana Bread, set your oven to 350°F (175°C) and allow it to preheat fully before placing your loaf inside. A properly heated oven ensures that the bread bakes evenly, resulting in a beautifully risen and golden crust.
Greasing the Loaf Pan: Ensuring a Perfect Release
To achieve a perfect loaf that releases easily from the pan, generously grease your loaf pan with butter or non-stick cooking spray. This step is vital to prevent the bread from sticking, which can lead to a messy presentation. For added assurance, you can also line the bottom of the pan with parchment paper, allowing for an effortless release after baking.
Mixing Wet Ingredients: Achieving the Ideal Creamy Consistency
In a large mixing bowl, begin by mashing the ripe bananas until smooth. To achieve the ideal creamy consistency, use a fork or a potato masher. Once the bananas are well-mashed, add in the crushed pineapple, eggs, melted butter, and sugars. Mix these wet ingredients together until you have a smooth batter, ensuring that all the elements are well combined. The key is to create a homogeneous mixture that will result in a moist and flavorful bread.
Combining Dry Ingredients: The Science Behind Proper Mixing
In a separate bowl, sift together the dry ingredients, including flour, baking soda, baking powder, and salt. Sifting is an essential step that not only ensures there are no lumps but also aerates the flour, promoting a light and fluffy texture in the final product. Gradually add the dry mixture to the wet ingredients, folding gently to combine. Be careful not to overmix; this can lead to a dense loaf. The goal is to incorporate the flour just until you no longer see dry spots, resulting in a beautifully textured Hawaiian Banana Bread.
By following these initial steps, you’re well on your way to creating a tropical delight that will tantalize your taste buds and impress everyone who has the pleasure of enjoying it. The combination of ripe bananas, crushed pineapple, and shredded coconut promises a delicious journey into the heart of Hawaii, all from the comfort of your kitchen. Stay tuned for the next part, where we will delve deeper into the baking process and additional tips for perfecting your Hawaiian Banana Bread.
Folding in Coconut: Techniques for Even Distribution
Once your batter is mixed to a smooth consistency, it’s time to incorporate the shredded coconut. This step is crucial for ensuring the coconut is evenly distributed throughout your Hawaiian banana bread, contributing to its delightful texture and flavor. To achieve this, use a gentle folding technique.
1. Use a Rubber Spatula: This tool is ideal for folding because it can easily scrape the sides and bottom of your mixing bowl, ensuring all ingredients are combined without deflating the batter.
2. Folding Technique: Start by adding the shredded coconut to the batter, then gently cut through the mixture with your spatula. Rotate the bowl as you fold, allowing the coconut to blend in without over-mixing. The goal is to incorporate the coconut evenly while keeping the batter light and airy.
3. Final Check: Once the coconut is folded in, check to ensure there are no clumps of coconut sitting at the bottom or sides of the bowl. Your batter should have a consistent texture with coconut dispersed throughout.
Baking the Bread
The baking process for your Hawaiian banana bread is where the magic happens. After prepping your batter, follow these steps to ensure a successful bake.
1. Preheat the Oven: Make sure your oven is fully preheated to 350°F (175°C) before placing the bread in. This ensures even baking from the start.
2. Pouring into the Pan: Transfer your batter into a greased 9×5-inch loaf pan, smoothing the top with a spatula. This helps the bread rise evenly.
3. The Baking Journey: Bake your Hawaiian banana bread for approximately 55 to 65 minutes. During this time, the batter transforms into a golden-brown loaf, and the aroma of banana, pineapple, and coconut fills your kitchen.
4. Signs That Your Bread is Ready: To check for doneness, perform the toothpick test. Insert a toothpick into the center of the loaf; if it comes out clean or with a few moist crumbs, your bread is ready. If there’s wet batter clinging to it, give it more time, checking every 5 minutes until done.
5. Managing Browning: If the top of the bread begins to brown too quickly, loosely cover it with a piece of aluminum foil. This will prevent the top from burning while allowing the inside to continue cooking through.
Cooling and Serving
Once your Hawaiian banana bread has baked to perfection, cooling it properly is essential for optimal flavor and texture.
1. Best Practices for Cooling: Allow the bread to cool in the pan for about 10-15 minutes. This resting period helps the loaf set and reduces the risk of it becoming soggy.
2. Avoiding Sogginess: After the initial cooling period, carefully remove the bread from the loaf pan and transfer it to a wire rack. This allows air to circulate around the loaf, preventing condensation from forming on the bottom, which can lead to sogginess.
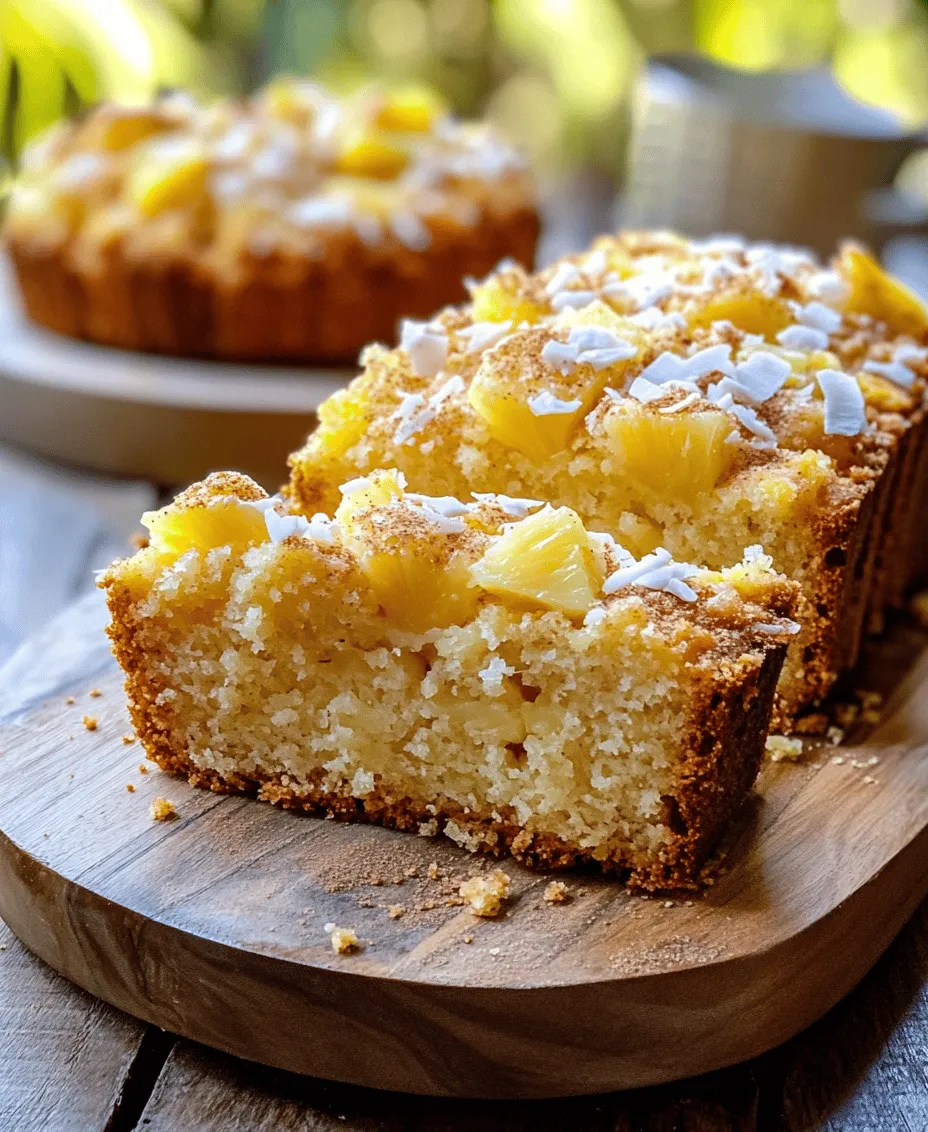
3. Slicing the Bread: For perfect portions, wait until the bread is completely cooled before slicing. Use a serrated knife to cut through the soft loaf without squishing it. Aim for slices about 1 inch thick for a delightful balance of crust and moist interior.
4. Serving Suggestions: Hawaiian banana bread pairs beautifully with a variety of tropical spreads and toppings. Consider serving it with:
– Cream cheese for a rich, tangy complement.
– A drizzle of honey or maple syrup for added sweetness.
– Fresh fruit, such as sliced strawberries or mango, to enhance the tropical theme.
– Coconut whipped cream for an indulgent touch.
Variations and Customizations
One of the joys of making Hawaiian banana bread is the versatility it offers. Here are some ideas for variations and customizations:
1. Exploring Alternative Ingredients: For an extra crunch and flavor, consider adding chopped nuts such as macadamia nuts or walnuts. This not only enhances the taste but also adds a delightful texture contrast.
2. Substituting for Dietary Needs: If you or your guests have dietary restrictions, there are several adaptations you can make:
– Gluten-Free: Substitute all-purpose flour with a gluten-free flour blend. Make sure to check that all other ingredients, including baking powder, are gluten-free.
– Vegan: Replace eggs with flaxseed meal (1 tablespoon of flaxseed meal mixed with 2.5 tablespoons of water per egg) and use a plant-based yogurt or additional mashed banana in place of dairy yogurt.
3. Creative Twists: Experiment with other tropical fruits by adding chopped mango or diced kiwi into the batter for an unexpected flavor burst. You can also incorporate spices like cinnamon or nutmeg to enhance the warmth of the banana bread.
Storage and Shelf Life
To ensure your Hawaiian banana bread stays fresh and delicious, follow these storage tips:
1. How to Properly Store Hawaiian Banana Bread: Once fully cooled, wrap the bread tightly in plastic wrap or aluminum foil. This helps keep moisture in while preventing it from drying out.
2. Understanding the Shelf Life: When stored at room temperature, the banana bread will stay fresh for about 3-4 days. For longer shelf life, consider refrigerating it, where it can last up to a week.
3. Reheating Techniques for Optimal Flavor Retention: If you enjoy your banana bread warm, gently reheat slices in the microwave for about 10-15 seconds. Alternatively, you can warm it in an oven preheated to 350°F (175°C) for about 5-10 minutes, which helps revive its fresh-baked flavor and texture.
Conclusion
Hawaiian Banana Bread with Pineapple and Coconut is not just a recipe; it’s a delightful experience that brings the essence of the tropics into your home. This easy-to-follow guide ensures that anyone can create this flavorful treat, making it the perfect addition to any meal or occasion. Enjoy the tropical flavors and share them with your loved ones for a taste of paradise in every slice!